Wrong End.
Just like Corpse Party, there are several endings within Corpse Party: Book of Shadows we can unlock if the player makes a wrong choice. There is a total of twenty-six endings, with the exception of the true endings.
Spoiler Warning!: Spoilers for Corpse Party: Book of Shadows follow
Episode #1; 『Seal』
#1; Wrong End 1 ★1
As Naomi Nakashima places the bucket on the floor and attempts to use it as a stool, she begins to try and loosen the noose around Seiko Shinohara's neck. Unfortunately, the rusted bucket gives way under her weight, causing Naomi to fall off it, pulling Seiko down with her, snapping her neck.
Requirements:
- Choose to use the bucket outside.
#1; Wrong End 2 ★2
Naomi tries to lift Seiko's body up in the air so she could breathe. Seiko, flailing her legs wildly, unintentionally kicks Naomi in the jaw, causing her to fall and pull Seiko down, snapping her neck.
Requirements:
- Choose to grab Seiko's body.
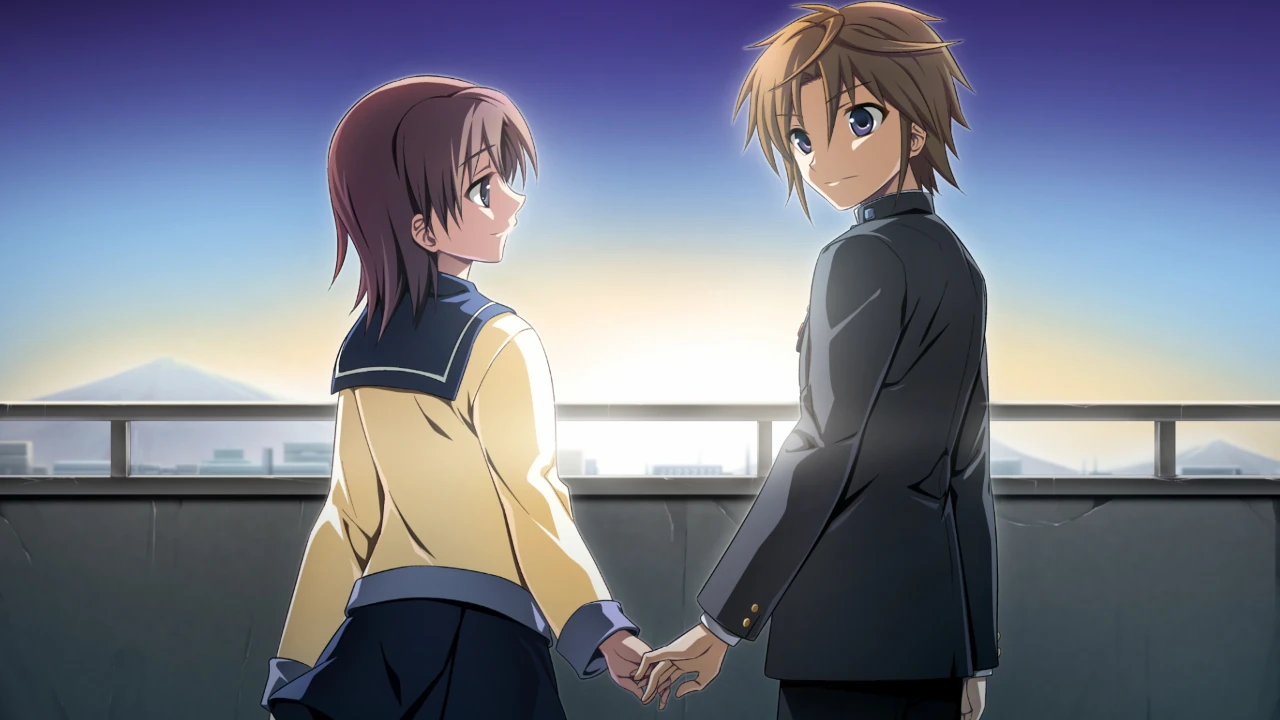
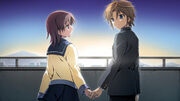
#1; True Ending ★3
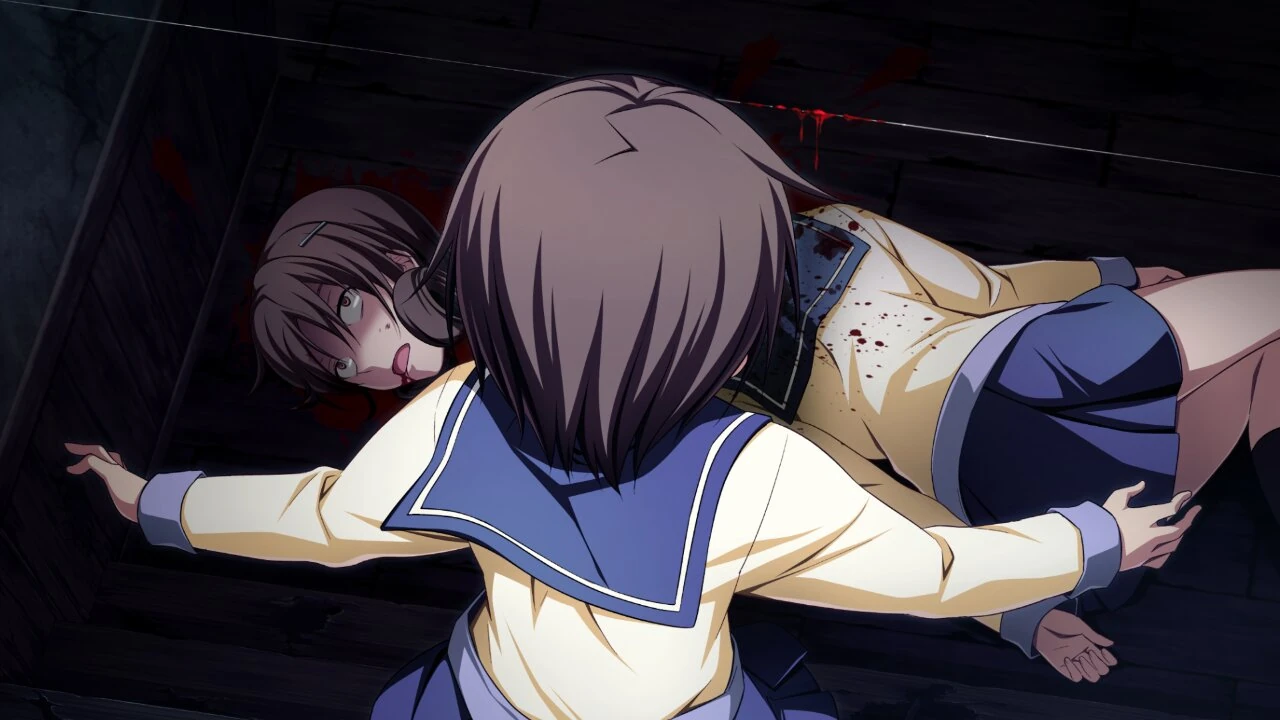
Naomi finding Seiko's beheaded corpse.
Naomi finds herself outside the girls' lavatories, with puddles of black ooze around her. She decides to return to the custodian's closet to find Seiko, but hears a familiar noise emanating from the girls' bathroom. She opens one of the stall doors to find Seiko hanging. She begins to try and find something to stand on, but recalls what happened in the previous timeline. She instead chooses to hoist Seiko on her shoulders, and manages to undo the noose.
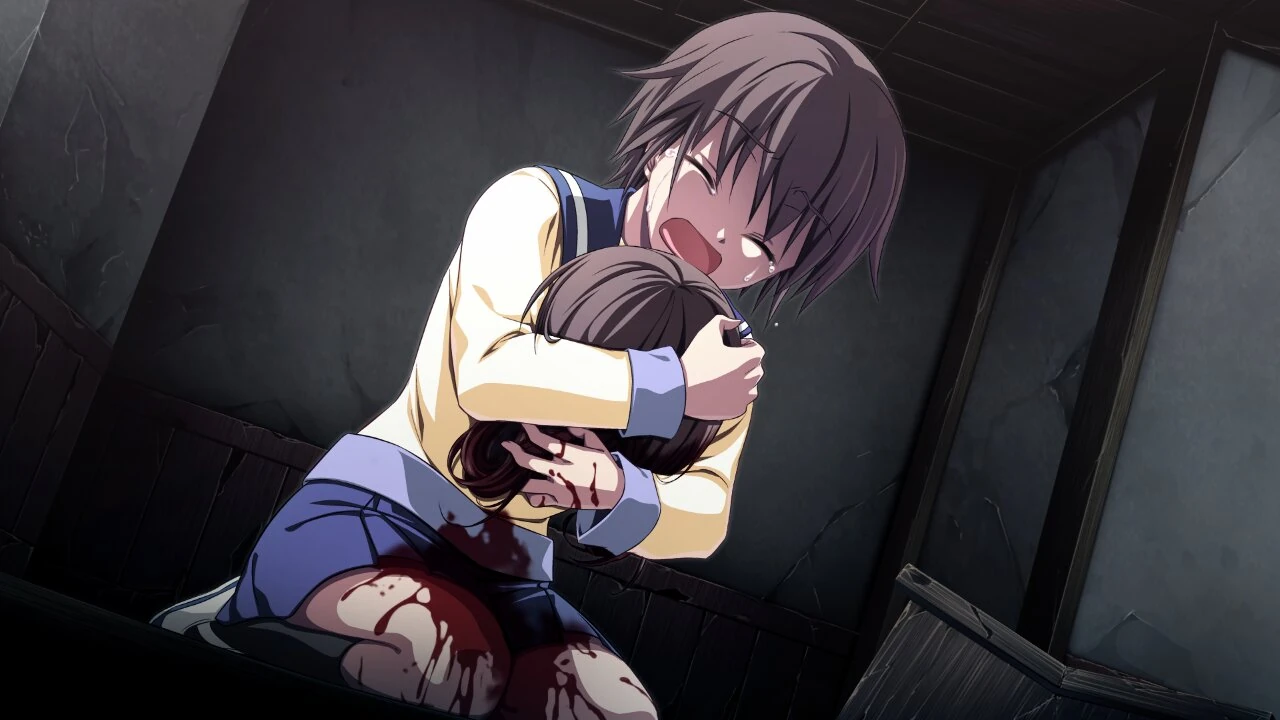
Naomi holding Seiko's head.
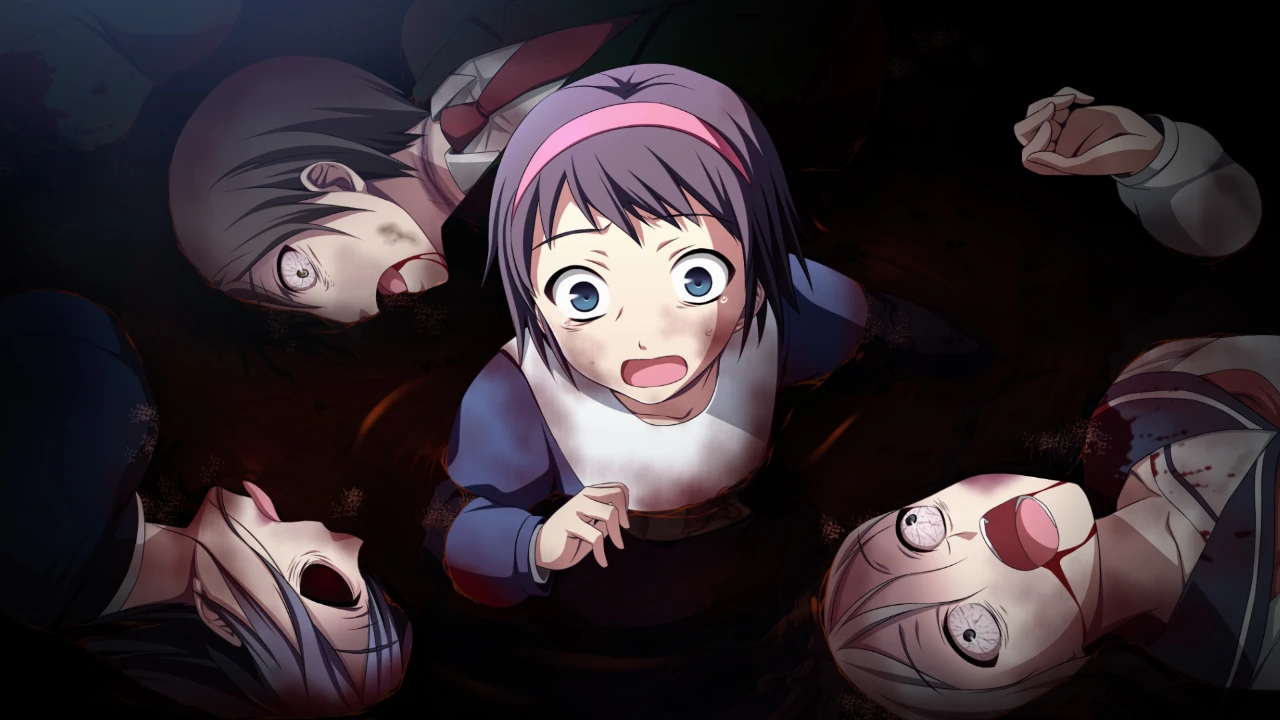
Naomi takes Seiko out of the stall and lays her on the ground. Naomi apologizes to her, but the moment she opened her eyes and saw Naomi, she began to scream and ran out of the room. Naomi follows her, and hears her fall down the staircase. She proceeds down the stairs, and finds Seiko's beheaded corpse lying at the bottom. She begins to scream as Sachiko Shinozaki appears nearby and laughs at her, revealing that those who died in the previous timeline cannot be saved, and they would suffer a more horrific fate each time they have been saved from their previous demise. Holding Seiko's head in her arms, she cries for help.
Requirements:
- Choose to hoist Seiko on your shoulders.
Episode #2; 『Demise』
#2; Wrong End 1 ★1
As Mayu Suzumoto catches the gaze of Ryou Yoshizawa, he disappears momentarily before appearing directly in front of her and grasping her wrist. Without letting go, he begins to forcefully pull on Mayu's hair. Ryou removes the hand that was on her wrist and begins strangling the life out of her, Mayu's body is then bent backwards unnaturally, causing extreme pain. Other hands start grabbing her, forcing her to the ground as Mayu's legs are pulled in opposite directions, completely tearing them off of her hips.
Requirements:
- Inspect Ryou in the entranceway.
#2; Wrong End 2 ★2
After looking into Ryou's eyes, Yoshiki Kishinuma finds himself in the dissection room, bound to a table and staring at the ceiling. He recognizes the room, but does not remember how. He hears a child's voice, and turns his head to see Sachiko standing next to the table with Yoshikazu Yanagihori. He unconsciously says her name, surprising himself. She seems happy to know he remembers her, and even more delighted that she gets to kill him in this timeline, since she missed her chance previously. She asks Yoshiki to take out his paper dolls scrap, but he yells at her, triggering Yoshikazu to smash his right ankle. Sachiko tells Yoshikazu to continue smashing his legs, slowly moving up his body.
Yoshiki tries his hardest to stop himself from showing her his pain or fear. This warrants Sachiko to tell Yoshikazu to bring in Ayumi Shinozaki, who is in severe pain and asking for death. Yoshiki snaps, screaming uncontrollably and beginning to tear up. Sachiko is beyond pleased to see this, and tells him that she doesn't plan on killing him. Though, if he wishes to die, she will gladly oblige.
Requirements:
- Inspect Ryou in classroom 4-A.
#2; Wrong End 3 ★3
Mayu and Yoshiki try stacking some desks to reach the bucket dangling over the tied up girl in the locker room. They discover that they are all stuck to the floor, so Mayu suggests that she could get on Yoshiki's shoulders to get some extra height. Mayu is able to retrieve the bucket, but a combination of it being too heavy and someone coating the handle with something extremely slippery makes her drop it. The bucket falls, emptying a jumble of nails, razors, scissors, and tacks directly onto the girl's face.
Requirements:
- Choose to try and reach the bucket.
#2; Wrong End 4 ★4
Yoshiki climbs down the rope, ending up in an extremely dark room. As his eyes adjust to the darkness, he notices that there are several corpses sprawled out throughout the room. He inspects one of the more recent ones, and finds the name tag of one of Nana Ogasawara's classmates. Next to her corpse, he recovers the bottle of water they spotted from above and prepares to climb back up. While climbing, the rope began to shake violently before he fell back to the floor, followed by the other end of the rope.
He tries asking Mayu what happened, but is interrupted by the body of Nana suddenly falling into the hole with half of her face smashed in. Panicking, he asks Mayu what's going on, only to have her asking for help in a pained voice. A loud smash is heard, along with several more agonizing cries from Mayu, before blood (with various human chunks) began pouring from above directly onto Yoshiki.
Requirements:
- Choose to send Yoshiki down the hole.
#2; Wrong End 5 ★5
Trying to cross the collapsed hall in front of classroom 2-A, they decide to use the makeshift rope to get across. Tying one end to a desk in the classroom, Yoshiki jumps the gap with the other end. He almost falls on landing, but manages to steady himself. Mayu then climbs over, but ends up dropping her student ID along the way. Nana prepares to cross, but Yoshikazu appears behind her. She grabs onto the rope in an attempt to quickly get over, but is smashed by the large man's sledgehammer, taking off both her legs as well as cutting the rope.
She manages to hang onto the rope, screaming in pain. She gets pulled up onto solid ground and Yoshiki ties the rope around her legs to try and stop the bleeding. Despite being safely across the gap from Yoshikazu, Yoshiki thinks it would be a good idea to get some distance, so they run off into the halls. As Nana falls unconscious, Mayu and Yoshiki try to think of what they could do, and decide on bringing her someplace safe for the time being.
Somehow, Yoshikazu comes down the stairs near the lavatories. He catches up to the group, hitting Yoshiki. Nana regains consciousness just as Yoshikazu stomps heavily on her stomach, forcing blood out of her wounds as if he was squeezing a juice box. Her bones begin to break under the pressure of the massive man's body weight, and stomach acid starts spewing from her mouth. Yoshiki tries to save her, but is swatted away into a nearby hole in the floor, falling to his death. Finally, Sachiko joins the fray, telling Mayu that it's her turn. Yuki Kanno appears nearby, asking Mayu to play, and Mayu remembers that now is when she dies.
Requirements:
- Do NOT obtain the notebook.
- Obtain the rope.
- Attempt to cross the hall in front of classroom 2-A.
- Get caught by Yoshikazu.
#2; Wrong End 6 ★6
In an attempt to hide from Yoshikazu, the group heads to the science lab. They find that the door is locked, and try to use the key Mayu found earlier. It works, so they head inside, locking the door behind them.
Assuming that the giant would have no problem smashing through the door, Yoshiki suggests they try to find something to protect themselves with. Upon inspecting the room, they find the corpse of a girl tied to a chair who seems to have had boiling oil poured over her head, with everything above her chest blackened beyond recognition. They manage to recognize her uniform, being the same as Nana's. Looking at her student ID, they find her to be Nana's classmate, Nari Amatoya. Nana regains consciousness, and starts to panic upon realizing the identity of the corpse. Mayu tries to calm her down, stating that her other friends might still be alive.
Yoshikazu then breaks down the door, and he, along with Sachiko, enter the room. Sachiko sadistically asks the group to guess what she's holding, before presenting the item, a human head. Nana recognizes it as her other classmate, Chihaya Yamase, and Sachiko cheerfully plays with the head like a ventriloquist, sticking her hand into the neck and moving the jaw up and down while mimicking her. Nana begs her to stop, using up the rest of her strength and slumping onto Yoshiki's back. Mayu and Yoshiki, frozen in fear, knowing that there was nothing else they could do, simply await their demise.
Requirements:
- Do NOT obtain the notebook.
- Obtain the rope.
- Attempt to cross the hall in front of classroom 2-A.
- Examine door to Science Lab
#2; True Ending ★7
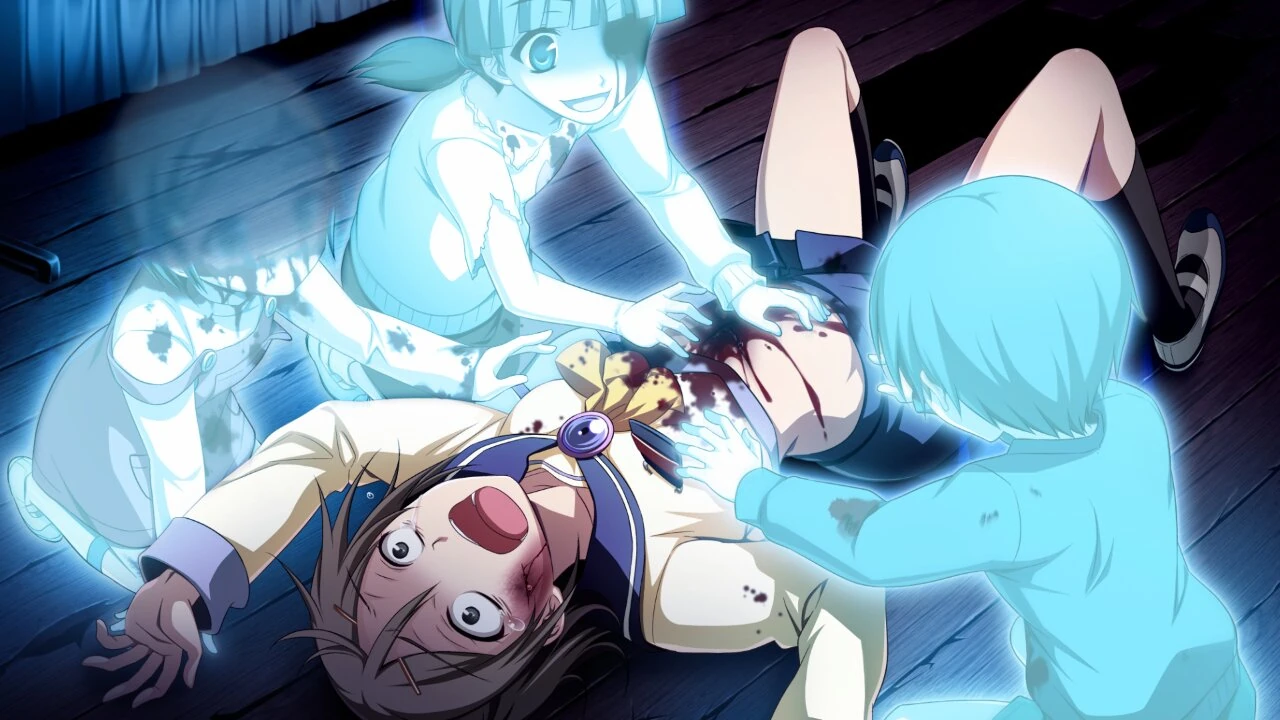

Mayu being torn apart by the children spirits.
After witnessing Yoshikazu dragging Nana away, Mayu returns to classroom 1-A. While thinking about how to break the news of Nana's demise to Yoshiki and Ayumi, she remembers the black markings on Nana's legs, recalling that she has a very similar bruise on her stomach. Noticing her own mark had begun to darken, she tries to calm herself down, but ends up spotting a new one on her face. Mayu panics, and Yoshiki and Ayumi come running to see what's wrong. She tries to hide the bruises from them, and runs to the Infirmary. She attempts to use some concealer to hide the mark on her face, and seems to have succeeded.
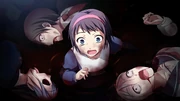
Once more, she tries to calm herself down, and then begins to leave the Infirmary, only to find the door to be shut and covered with hair. Noticing someone behind her, she turns to see Sachiko, who suggests using Mayu for a human dissection. The other three children spirits manifest in the room, and Mayu finds that blood has begun dripping onto her hand. Sachiko tells Mayu to look at herself in the mirror, and she does so, finding that the mark on her face was visible once more, and was now also bleeding. She looks at her stomach afterwards, and sees the same thing. Sachiko then gives the child spirits the go ahead to begin the "autopsy," and they start digging into Mayu. In her final moments, as the ghosts begin to decorate the walls with her innards, she thinks of Sakutaro Morishige, hoping that he won't think any less of her due to her new appearance. Her final wish is that he will be the one to find her body, and to still think that she's beautiful.
Requirments:
- Meet up with Yoshiki.
- Save Nana.
- Find the notebook.
- Find Ayumi.
Episode #3; 『Encounter』
#3; Wrong End 1 ★1
After grabbing the pencil case, Yui Shishido decides to leave the classroom. Once she takes a step out of the room, the door slides shut onto her neck with incredible force. She tries everything she can do to escape but the more she struggles the more the door pushes on her neck. Finally, the door manages to push hard enough that her head comes off. As her head rolls on the floor, Yui sees the familiar old woman from that morning standing above her.
Requirements:
- Choose to leave the classroom.
#3; Wrong End 2 ★2
Yui manages to squeeze herself into the metal locker. Thinking the spirit will leave, she decides to wait for the footsteps to pass by. She notices that the footsteps aren't receding, but instead are getting closer and louder. They then make a sudden halt in front of the locker, and after waiting a little longer, Yui hears a door locking. She tries to open the locker, but is unable to do so. The walls of the locker then begin to close in on Yui, crushing her skull.
Requirements:
- Choose to stand at the teacher's podium.
- Choose to hide in the supply locker.
#3; Wrong End 3 ★3
Thinking the spirit would leave, Yui decides to stay hidden inside the teacher's podium. After a moment, Yui's body was suddenly weighed down, locking her in place. She hears a female voice, and desperately tries to get whoever was weighing her down off. The person on her back then digs their razor sharp fingernails right into Yui's eyes. Yui then falls to the ground and bleeds out.
Requirements:
- Choose to stand at the teacher's podium.
- Choose to hide at the teacher's podium.
- Choose to stay hidden in the teacher's podium.
#3; Wrong End 4 ★4
Thinking on impulse, Yui grabs the broom so she can defend herself. Dashing out of the room where the old woman was, Yui thrusts the broom out and stabs the ghost in the eye. Unexpectedly, the broom shatters into countless pieces. The ghost then grabs Yui around her neck, lifting her off the ground and snapping it.
Requirements:
- Choose to stand at the teacher's podium.
- Choose to hide at the teacher's podium.
- Choose to make a break for it.
- Choose the grab the broom or allow the timer to run out.
#3; Wrong End 5 ★5
Having no other choice, Yui chooses to keep running as the front doors to the school are locked. Running aimlessly, she finds herself in the second floor hallway. There is an outside corridor connected to the building that was the first escape route that came to Yui's mind. As she hides near the ledge of the corridor, Yui takes out her pencil and prays Tsukasa Mikuni will save her.
A few moments later she feels something grab her arm. Yui tries to break free of Yoshie Shinozaki's grip, but it was too strong to get out of. Finally, after struggling violently, the grip broke free by Yui throwing her body off of the ledge, plummeting to the ground. Yui once again pulls out Tsukasa's pencil and begins praying into it. As Yui crashes into the ground she notices that the pencil has pierced deep into her throat.

Tsukasa waiting for Yui to wake up.
Requirements:
- Choose to stand at the teacher's podium.
- Choose to hide at the teacher's podium.
- Choose to make a break for it.
- Grab the salt.
- Run somewhere else.
- Pray to the pencil.
#3; True Ending ★6
Yui and Tsukasa, on the roof of their school.
Requirements:
- Choose to stand at the teacher's podium.
- Choose to hide at the teacher's podium.
- Choose to make a break for it.
- Grab the salt.
- Break the glass OR run somewhere else AND reach your hands out.
Episode #4; 『Purgatory』
#4; Wrong End 1 ★1
Having no other choice, Sayaka Ooue hides under the bloody table. The man she heard has now made his way into the room. He drops a girl on the table who was either injured or being injured. Shortly after that the weapon he was using drops on the floor. He sees Sayaka under the table and drags her out, throwing her across the room and breaking her trachea. Yoshikazu then puts Sayaka in the large metal locker. She then hears the girl screaming for help that is now dangling from the table that was flipped upside down. After several days passed Sayaka doesn't hear the girls voice anymore and wonders if she is dead or not.
Requirements:
- Choose to hide under the blood-soaked table.
#4; True Ending ★2
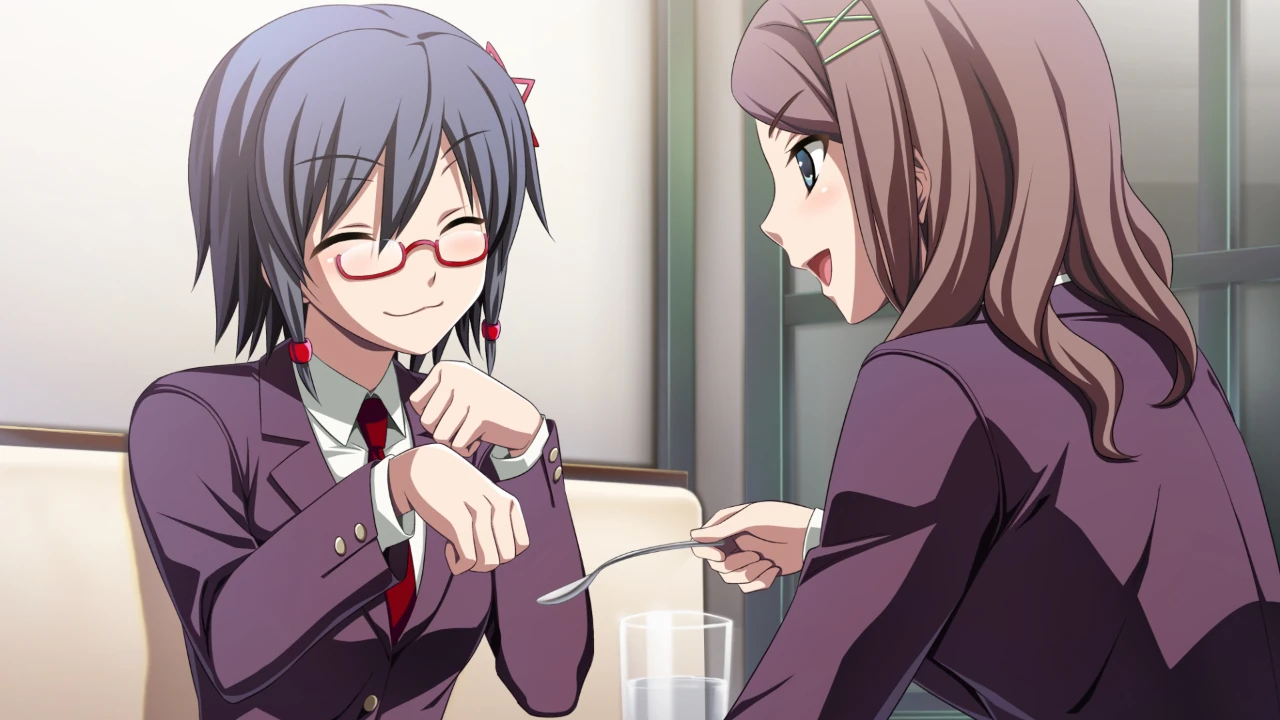
Naho and Sayaka enjoying sweets together.
Thinking quickly, Sayaka decides to hide in the closet. At that point, Yoshikazu comes in, dragging along a girl with him. He sets the girl on the table and begins to tear her tongue out. The mere sight of this chills Sayaka to the bone and causes her to urinate from fear, but she is able to hold out until Yoshikazu leaves.
Sayaka then spends the next few days searching for Naho Saenoki, but finds herself unsuccessful. She begins to starve, having no food on her except for a piece of chocolate, but she refuses to eat it because her mother gave it to her and she considers it a memoir. After several days, she has a dream about finally finding Naho, but in reality, Yoshikazu is dragging her to the dissection room. The chapter ends with Sachiko, while watching Sayaka dream, eating her piece of chocolate.
Requirements:
- Choose to hide inside the cabinet.
Episode #5; 『Shangri-La』
#5; Wrong End 1 ★1
Mitsuki Yamamoto doesn't want to carry the head with her hands, so they set out for something else to carry it in. They decide to use the bucket. Masato Fukuroi pushes the head into the bucket, and they take it back to the spirit. The spirit sees that his head has become "ugly" and then points his rage at the students, saying that he will make them join them (the other victims of the school). Mitsuki wakes up in the basement to see that Masato's neck has been severely twisted, and he was dead. Mitsuki then sees Yoshikazu, asking for his help, when Yoshikazu suddenly attacks her and kills her.
Requirements:
- Choose to help the red spirit.
- Don't run from the figure coming towards you in the bomb shelter.
#5; Wrong End 2 ★2
Instead of waiting for the figure, Mitsuki chooses to run, and the figure, Shougo Taguchi, calls out for her. Mitsuki runs into the girl in red and asks her if she would accompany her. The girl in red leads her around for a while, and when Mitsuki asks her name, she admits it to be Sachiko Shinozaki. Then Mitsuki finds herself in the dissection room. Sachiko asks her how many of the dead bodies are her friends, saying that she'll willingly give them back. Yoshikazu then chases Mitsuki across the room, until her leg gets caught in a bear trap. Yoshikazu puts her onto the dissection table, while Sachiko begins to peel off her skin and let her see her own face.
Requirements:
- Choose to help the red spirit.
- Run away from the figure coming towards you in the bomb shelter.
#5; Wrong End 3 ★3
Mitsuki peers through the hole in the girls' lavatory, and sees another eye looking back at her. Masato looks through the hole also, and the girl inside stabs him in the eye with an ice pick. The girl revealed to be Yuki asks Mitsuki if she is the one who let the boy into the girls' lavatory. Before she can answer, Yuki then proceeds to attack Mitsuki, making her suffer in pain, until there is nothing else Mitsuki can concentrate on. In her last moments, she begs for anyone or anything to save her from the pain.
Requirements:
- Choose to look into the hole in the girls' lavatory.
#5; Wrong End 4 ★4
Sakutaro decides to jump into the hole to see what's inside. Once inside, he sees the body of his class rep, Ayumi. He mourns over her death, and wishes to bring her something of her back to her family. He decides to bring back her hair, and begins ripping it out with his teeth. But he is unable to do so, he decides to take her tongue. But seeing as her tongue has already been removed, he settles on taking her tooth. As his obsessions get the better of him, he succumbs to the darkening, everything around him turning black as he calls out Mayu's name.
Requirements:
- Jump into the hole.
#5; Wrong End 5 ★5
Sakutaro wakes up tied to a chair, where Sachiko looms over him. She doesn't know how she's going to kill him yet, so she decides to play around with Emi Urabe first. After putting her in extreme pain, she asks Sakutaro if he wants to join in, and he accepts without question.
Requirements:
- Let Sakutaro's Darkening Meter reach 100% in any room.
#5; Wrong End 6 ★6
Mitsuki throws the oil lamp at the giant man and it bursts into flames. Yoshikazu is then engulfed in the flames, but that doesn't stop him. Yoshikazu grabs hold of Mitsuki, making her burn along with him. Mitsuki writhes in pain for a while, before Yoshikazu then begins to hold his seething hammer to her face. Afterwards bringing it down full force onto her face, ending her life.
Requirements:
- Clear the chapter normally. Wrong ends 6 and 7 can only be unlocked after clearing the chapter.
- Complete the chapter as normal. A new scene with Mitsuki and Masato will occur.
- Choose to go to the second floor.
- Light the lamp.
#5; Wrong End 7 ★7
Mitsuki asks for Yoshikazu to spare her, but he shows no mercy. Later, Mitsuki wakes up in the science lab. She hears a girl, Nari, screaming in pain, and wonders who it is. It appears that she was boiled alive, and it reminds Mitsuki of food. Sachiko then appears, and says that she is going to do the same thing to Mitsuki. Frying noises can be heard at the end.
Requirements:
- Clear the chapter normally. Wrong ends 6 and 7 can only be unlocked after clearing the chapter.
- Complete the chapter as normal. A new scene with Mitsuki and Masato will occur.
- Choose to go to the second floor.
- Choose to try something else.
#5; Wrong End 8 ★8
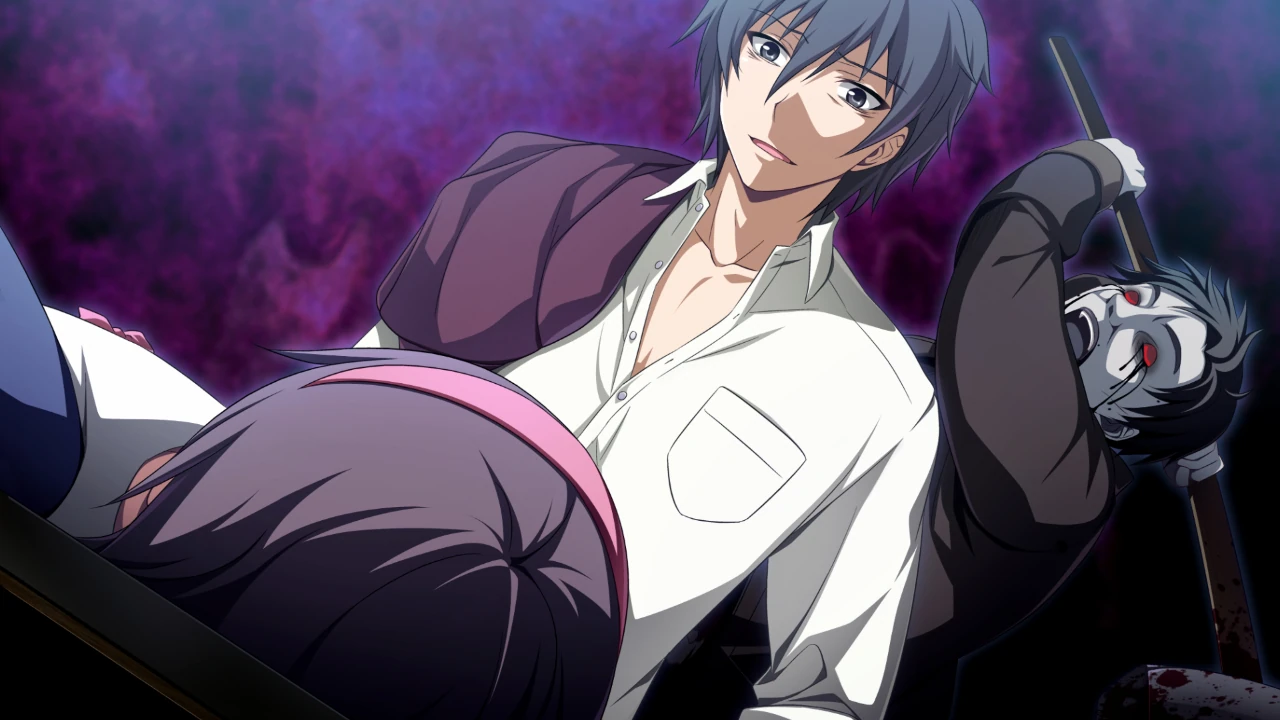
Sakutaro thrilled about the bodies he took pictures of.
Sakutaro looks back and sees Mitsuki, who has just run away from Yoshikazu, at the loss of Masato. The two of them begin traveling together again, and they end up in a cold, dark hallway. Sakutaro runs into her and they both fall over. Mitsuki then proceeds in trying to seduce "Shig." Mitsuki begins bleeding, and Sakutaro struggles to get off of her. It turns out that Mitsuki was really Sachiko all this time; an illusion. Sachiko then begins to mock Mayu, telling Sakutaro that she is dead. Sachiko is amused by Sakutaro and others like him who come to the school. Sachiko then disappears into the floor, leaving Sakutaro to see what had become of Mayu.
Requirements:
- Look back.
#5; True Ending ★9
Morishige is enchanted by the sight of Mitsuki Yamamoto's body (after she was murdered by Yuuya Kizami), and takes numerous pictures. He returns to where he's found Mayu's body nailed to the wall (though he remains unaware that it's in fact her), calling the ghastly remains the one place where he feels truly at peace. He realizes that before he returns to the real world, he'll have to delete the pictures he's taken. He sees the folder as an obstacle to be overcome before he can return to the world of the living with Mayu, and leave it all behind him.
Laughing to himself, he decides that it should be all right if he deletes them after he returns.
Episode #6; 『Mire』
#6; Wrong End 1 ★1

Yuuya Kizami's impending doom.
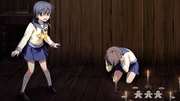
Yuka Mochida tries to run away from Yoshikazu, but her limbs are too numb to get her very far, and Yoshikazu is able to quickly catch up to her, and upon doing so he strikes Yuka's right arm with his giant hammer. Yoshikazu then proceeds to beat Yuka's limbs until they resemble those of a swatted bug. She tries to roll to the door (her limbs having fallen off from being smashed) in a last hope to escape from her demise. In Yuka's last moments, she is able to see in two opposite directions as her skull is split in half like a watermelon.
Requirements:
- Run for the door.
#6; Wrong End 2 ★2
Yuka surrounded by numerous bodies in a pool of blood.
Yuka once again hears the giant man yelling out for her, but as she tries to run she finds that she is unable to do see because of a darkness that mysteriously enters her entire body. In her last moments, Yuka calls out for her big brother to help her.
Requirements:
- Let Yuka's Darkening Meter rise to 100% in the science lab by choosing to leave the acid.
#6; Wrong End 3 ★3
Yuka hears Yoshikazu coming for her, but she is unable to move, because at that moment she begins to faint and succumb to the darkening.
Requirements:
- Examine the cabinet in the death room before meeting up with Sachiko.
- Let Yuka's Darkening Meter reach 100% in while trying to escape by choosing to leave the nail puller.
#6; True Ending ★4
Yuka meets up with Sachiko and decides to take her along, not knowing who she is. Over time, Sachiko asks for Yuka's socks and then her shoes, both of which Yuka gives up. She then asks for Yuka's hairband. If Yuka gives her the hairband, Sachiko will then ask Yuka for her life. Yuka realizes that she is in some kind of trance and tries to resist, but ends up agreeing to give Sachiko her life. The giant man catches her and smashes her head, splattering her brain on the ground. Sachiko takes a picture of that and decides to send it to her big brother.
Alternatively, if Yuka does not give up the hairband, she agrees to help Sachiko search for it, and the two wind up in the corpse disposal room, where Yuka almost drowns in a pool of bodies as Sachiko laughs. Yuka passes out in the body pool and wakes up next to Sachiko, who cries and apologizes. Yuka decides she must have been hallucinating and apologizes to Sachiko. The two leave, but Yuka gradually finds herself slowing down. At this point, the game ends the same way as it would if Yuka had given up her hairband.
Requirements:
- In the Science Lab, choose to "consider other options".
- Play through the chapter normally afterward.
- When Sachiko asks for your hairband, choose either option. Both choices will lead to the true ending: "Give it" will immediately lead to the true ending, while "Stand firm" has extra gameplay and an extra CG but eventually merges back up with the true ending.
Episode #7; 『Tooth』
#7; Wrong End 1 ★1
Tohko Kirisaki chooses to examine the young boy sitting in the corner. After doing so, Ryou disappears momentarily before reappearing right in front of Tohko, causing her to scream in terror. Laughter from a little girl can be heard as everything goes red, and then black.
Requirements:
- Inspect Ryou in the stairway without the Amethyst.
OR
- Try to sneak by Ryou in the stairway.
#7; True Ending ★2

Byakudan classmates trying to think of a way to escape without losing Ryosuke Katayama.
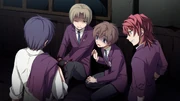
We're put into the shoes of Tohko, who starts off the chapter with Emi. Head toward the nurse's office for another scene, and after a sequence of events, you’ll be back in control on the second floor. Head back to the third floor and Ryou will block you from going back upstairs.
Head back to the first floor, then the exit, to meet a spirit who will give you an amethyst. Head back up to the second floor, approach the stairs, and use the amethyst on Ryou to clear the path. A long sequence of events plays out here, along with a choice to be made, though the actual choice don't matter.
Prologue; 『BloodDrive』
#prologue; Clear! ★1

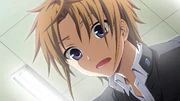
Naomi with a headache while Ayumi looks in horror.
While it seems like Ayumi is going to die because of the sawblade digging into her neck, Hinoe Shinozaki appears, sprinkles holy water over the proxy dolls, and recites a spell. After this, the blades disappear. Ayumi cries and hugs Hinoe. Then, Hinoe's head is ripped off, leaving a bloody mess.
Significant plot details end here.